- Version
- Download 352
- File Size 10.7 MB
- File Count 1
- Create Date March 14, 2022
- Last Updated March 14, 2022
Parking Management System in PHP CodeIgniter with Source Code
A fully functional project based on the Vehicle Parking Management System that use the PHP programming language and the CodeIgniter Web Framework. The PHP CodeIgniter project below has all of the necessary capabilities for second and final year IT students to employ in their college projects. It comes with a number of features that allow users to keep track of where their vehicles are parked. This system, as well as the web application, has a clear concept that is similar to real-life scenarios and well-implemented. Please scroll down to the bottom of this post for the Download button to get a free parking management system project in PHP CodeIgniter Framework with source code files.
About Parking Management System PHP Project
Moving on, this PHP CodeIgniter Parking Management System project is primarily concerned with keeping track of car parking. Additionally, the system displays all available parking spaces along with their current availability. Additionally, the system allows for the insertion of parking fees. Admin and Employee Panel are the two sections of the project. An employee with limited access to the system is shown in an overview of this web application. In order to control employee accounts, an administrator must set and enable a variety of access patterns. In other words, an employee can only access the portion he or she has chosen. However, each employee can see the amount of available parking spaces, total parking, and overall profits by default.
Admin Panel
An administrator, on the other hand, has complete control over the system. Every part can be maintained by an administrator. The management of vehicle classifications and parking places is the initial step in this system. For this, the administrator must give a few simple details. Choose a name for the category and a status for it. The same may be said for the administration of parking spaces. The admin must fill in the slot’s name, status, and availability here. Following this administration, the user can now go on to maintaining parking fees. This rate is constant throughout the system. This section contains parameters such as rate name, vehicle category, rate type, and rate. The next phase requires that the parking rate be maintained.
Manage Vehicle Parking and Parking Slips
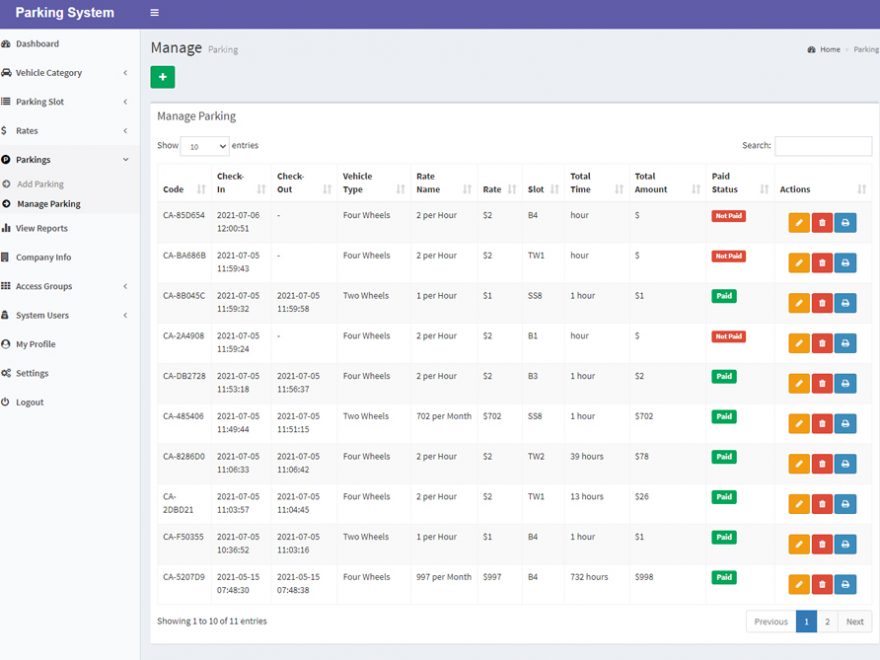
Finally, the user may control vehicle parking after a lengthy process. An administrator must choose available parking slots, vehicle types, and fees while managing vehicle parking. The system changes the availability state of selected parking slots to occupied and records the current date and time after submission. During the payment process, the current date and time are quite important. The system computes the total hour of car parking and multiplies it by the parking rate chosen. In addition, the user must change the form and alter the payment area for the vehicle’s exit. When the payment status is changed to paid, the system calculates total earnings based on total hours worked.
Available Features:
- Admin Panel
- Employee Panel
- Vehicle Category Management
- Parking Slot Management
- Maintain Parking Rates
- Manage Vehicle Parking
- Slot Occupancy
- Parking Slips
- Monthly Reports
- Total Earnings
- Pending Payments
- Update Company Information
- Set Currency
- Manage Access Groups
- System User Management
- Profiles
- Account Settings
| Project Name: | Parking Management System |
| Language/s Used: | PHP with CodeIgniter Web Framework |
| PHP version (Recommended): | 5.6 or Newer |
| Database: | MySQL |
| Type: | Web Application |
| Developer: | Rahmat Subandi |
| Updates: | 0 |
How to Run This Project:
Follow the steps below should be performed after you’ve started Apache and MySQL server in XAMPP.(windows)
- The first step is to extract the file.
- Secondly Make a copy of the main project folder.
- Thirdly Paste the code into xampp/htdocs/
Process to Connect Database with system.
- Fourthly Open a browser and type “http://localhost/phpmyadmin/” into the address bar.
- After that go to the databases tab.
- Sixthly Name your database “wmsci” and then go to the import tab.
- then Select the “wmsci.sql” file from the “DATABASE” folder by clicking on browse file.
- After that Press the enter key.
After you Successfully Connect Database in House Rental System Project.
- finally Go to “http://localhost/floder name/” in your browser.
LOGIN DETAILS ARE PROVIDED IN “Readme.txt” FILE INSIDE THE PROJECT FOLDER.
CLICK HERE FOR PROJECT REPORTS AND TUTORIALS
for Our YouTube Videos Click here. | To download more Project Click Here .For Latest Information| Our Twitter account | Our Facebook page.
